Monday, 31 December 2012

Summer Sewing Challenge

image matryoshka babushka doll paper pieced quilt block

This summer I have decided to challenge my, somewhat dubious, sewing skills by attempting to learn two new sewing techniques.  The first, and possibly hardest, technique I want to learn is paper piecing.  Now, until I was given a few cute paper piecing patterns from Bubble Stitch (including the sweetie matryoshka above), I had always thought of paper piecing as a method used only by quilters wanting to make super intricate star or geometric shapes for their quilt blocks.  Of course, I have since discovered that paper piecing can be used to create all sorts of delightful sewn images of objects, including flowers, teacups and animals!

image faux bois fabric black white turquoise sepia

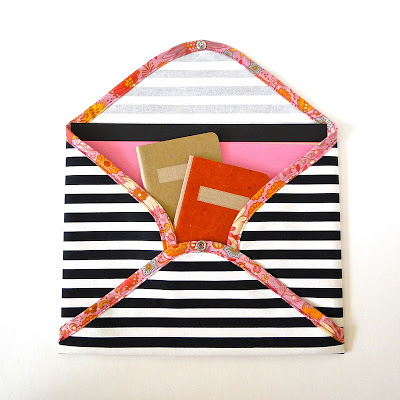
The next technique I am planning to learn is bias tape making.  I have had a handy dandy bias tape maker sitting in my craft area for at least six months now, just waiting for me to build up the courage, and find the time, to try making some of my very own bias tape.  I've finally decided to make my own bias tape because I bought some gorgeous faux bois fabric to make a little fabric envelope/tote for carrying my craft WIPs (see photo below).  And the design of my chosen fabrics is such that I thought a little homemade bias tape would add some character to the envelope!

image fabric envelope stripe

 Don't you think a strip of floral turquoise fabric would beautifully complement the black and white and turquoise faux bois fabrics I've chosen?  So let me ask you, have you got any tips for paper piecing or bias tape making?  And do you have any creative techniques you've been wanting to attempt but just need a little bit of time and courage?

Wednesday, 26 December 2012

Holiday Free Shipping

image tuscany earrings jade green fuchsia pink sparkle vintage
 
Well, all the official celebrating has been done here at Two Cheeky Monkeys, and, despite my best efforts, I ate too much good food.  Although all the Christmas parties are over, we're still in holiday mode for another five weeks, with my cheeky monkeys not starting the new school year till the very end of January.  But don't worry, I will still be blogging on occasion and both Two Cheeky Monkeys and Domum Vindemia will be open to customers as usual.  And because I won't be able to post purchases as speedily as usual over the Christmas/new year holiday period, I am offering FREE SHIPPING to my lovely, loyal customers!
 
image red riding hood set two cheeky monkeys girls' rings set trio owl flower cabochon
 
Free shipping terms:
Two Cheeky Monkeys on Etsy or Madeit - Australian purchases over $60 and international purchases over $100 will receive free regular shipping.  Tell me FREESHIPPING in the message to seller to receive a refund on your shipping.
 
Domum Vindemia on Etsy or Madeit - Australian purchases over $75 and international purchases over $125 will receive free regular shipping. Tell me FREESHIPPING in the message to seller to receive a refund on your shipping.
 
image retro cupcake stand vintage green blue 60s domum vindemia

Monday, 24 December 2012

Merry Christmas 2012!

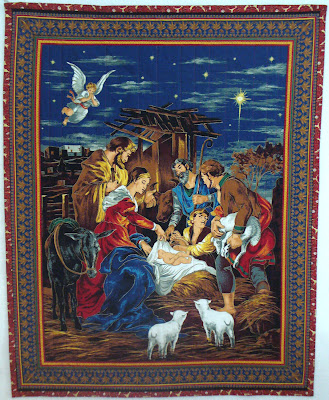
image nativity scene christmas quilt angels jesus mary joseph shepherds
 
Well, another year is almost over and I am glad to report that 2012 has been less tumultuous for us here at Two Cheeky Monkeys than our previous year.  I want to take this opportunity to thank all of you for supporting and encouraging me this year.  To everyone who has commented on the blog, made purchases, recommended my stores to friends and family or been a shoulder to cry on or a sounding board, thank you so much.  I wish all of my wonderful friends, family and readers a joyful and wonderful Christmas and a blessed 2013 ahead!
 
"She will give birth to a son, and you are to give him the name Jesus, because he will save his people from their sins.”
Matthew 1:21 (NIV)
 
Image source: Grandma Hen

Thursday, 20 December 2012

A DUSTy Kris Kringle

image inner earth soaps candy cane vanilla sugar scrub
You should all know by now that I love to take part each year in the DUST team kris kringle/Christmas craft swap.  For those of you who can't remember, each of our participating members is assigned a recipient for whom they should make a surprise Christmas gift.  This usually involves some (or a lot) of sneaking around to find out a recipient's likes and dislikes and is generally a lot of creative fun and great for team end of year spirits.
image cupcake stand vintage colclough saucer yellow roses full bloom
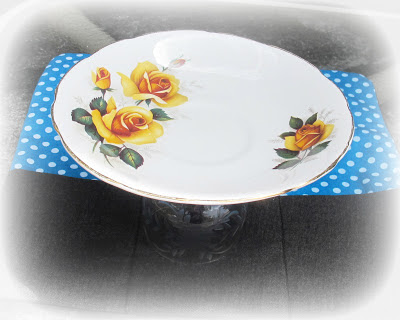
This year, my recipient was Donna of Donna Duncombe Designs.  Donna creates the cutest crochet hooks with polymer clay handles, as well as digital stamps and scrapbooking sets.  It didn't take much snooping to discover that Donna loves colour, and lots of it, so I started firstly with creating a bright and cheery cupcake/jewellery stand.  The saucer part of the stand dates to the 1950s and 60s and I love the golden yellow of the rose design.
image craft tool pouch pliers paint brushes crochet hooks polka dot blue white black
Because Donna is not just a creator of crochet hooks, but a crocheter herself, I also made her a craft tool pouch for storing her hooks.  And of course, I just had to use polka dot fabric to spruce up the sturdy, but plain, outer fabric of the tool pouch.
image craft tool pouch polka dot rainbow white black red green yellow blue crochet hooks jewellery pliers
I couldn't leave the outside of the pouch plain, so I added some giant polka dots in rainbow spot fabric.  I had a lot of fun making this pouch for Donna and am seriously considering making some with reclaimed vintage fabrics/denims and doilies for Domum Vindemia - what do you think?
And has the delightful image of soaps at the top of this post got you wondering?  Well, that was my lovely gift from Erin of Inner Earth Soaps.  I have long been a fan and user of her products and she very thoughtfully sent me a package of some of my favourite scents - thanks Erin!

Tuesday, 18 December 2012

Pantone 2013 Colour Trends

Every year PANTONE, the self-confessed world authority on colour and colour systems, puts out a prediction for the year's hottest colour and colour trends.  And, 2013 is no different, with emerald (PANTONE colour 17-5641) being touted as the next big thing in the colour world.

image mr darcy emerald bracelet vintage glass stone pride and prejudice jane austen upcycled book text pantone

But in case emerald isn't really your colour of choice, PANTONE has also released their colour palette prediction for the northern hemisphere Spring.  This ten colour palette is sure to have something for everyone with a mixture of pastels, summer and winter colours.

image pastelles ring set trio girls children lilac mauve peach apricot pastel blue turquoise grayed jade african violet pantone
Grayed jade, African violet and nectarine - Pastelles ring set

image ibiza earrings lemon yellow lemon zest dusk blue turquoise vintage glass stone brass
Dusk blue and lemon zest - Ibiza earrings

image printemps doily scarf hand dyed vintage tender shoots green lime lemon zest yellow dusk blue aqua pastel linen pink cream beige
Tender shoots, dusk blue, lemon zest and linen - Printemps scarf

image sunset margarita necklace poppy red black ribbon bright faceted

image domestika ring adjustable monaco blue navy white moroccan vintage east german cabochon acrylic dome
Monaco blue - Domestika ring

So what do you think of PANTONE's colour predictions?  Do they catch your fancy, or will you just stick to the colours you love best?

Friday, 14 December 2012

Oh Christmas Tree

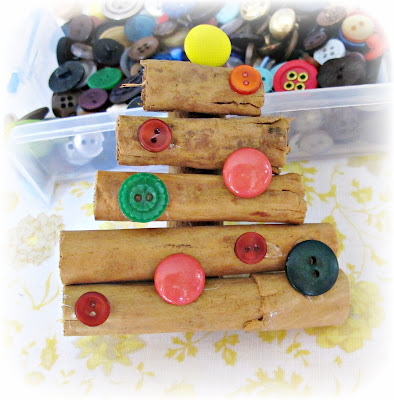
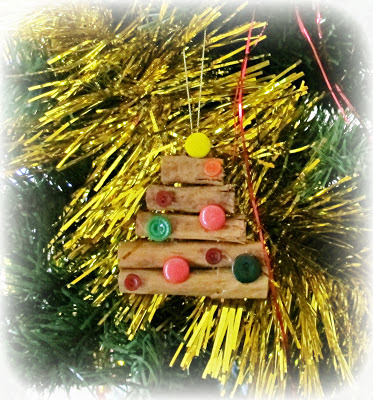
image christmas tree ornament tutorial cinnamon buttons diy

 As you all probably know by now, I have a thing for making Christmas ornaments for my secondhand and slightly lopsided Christmas tree!  This year has been no different, though our creative theme was mostly shrinky art ornaments (see here), which may not appeal to everyone (though I can't see why not, LOL).  So I thought I would share a tutorial which I wrote for the Creative Collective blog (which sadly no longer exists) last year; this one will appeal to those who love more "rustic" ornaments.
 
Materials
- one packet of dried cinnamon sticks
- a handful of small buttons in your favourite Christmas colours (I went with the traditional red and green)
- one yellow or star-shaped button
- one eye pin or 3cm length of beading wire
-  20cm length of cord or thin ribbon to match your buttons
- your handy dandy hot glue gun (or other quick-setting craft glue)
- heavy duty scissors or kitchen shears
 
Method
image diy cinnamon stick christmas tree ornament tutorial
 
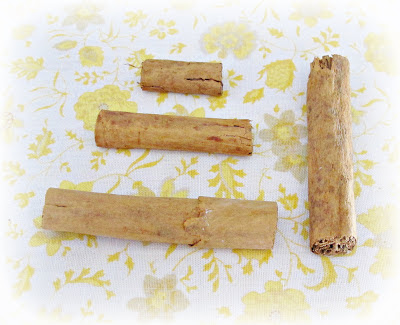
1. Lay out your cinnamon sticks and choose the most uniform and similar ones for this project.  Leaving one full length stick to use as the trunk of your tree, create stylised "branches" for your tree by cutting the other cinnamon sticks to size with the kitchen shears.
 
image diy cinnamon stick christmas tree ornament tutorial
 
2. Once you have all your pieces cut to size, start gluing the shorter cinnamon sticks across the "trunk" piece so that they look like the branches of a Christmas tree.  You should now have a stylised, triangular Christmas tree shape.
 
image diy cinnamon stick christmas tree ornament tutorial add buttons
 
3. Place your buttons onto the "tree" to determine where you want the mini "ornaments" to sit, then glue them in place when you are satisfied with your arrangement.  If you have a suitable star or angel button, you could use that for the top of the tree, but I have opted to use a bright yellow button instead.
 
image diy cinnamon stick christmas tree ornament tutorial insert beading wire for hanging
 
4. Next, twist the beading wire to create a small loop for the hanging cord, making sure to leave at least 1cm of extra wire beneath the loop to attach it to the ornament.  Securely glue the wire loop into a crack in the top of the cinnamon stick "trunk" (as you can see, I went a bit crazy with my hot glue).  If you are using an eye pin for the hanger, shorten it to approximately 1.5cm long before gluing it to the cinnamon trunk.
 
image diy cinnamon stick christmas tree ornament tutorial thread the eye pin hanger with cord or ribbon
 
5. Thread the cord or ribbon through the wire loop and knot the ends to secure.  And there you have it, a beautiful-smelling mini Christmas tree to hang on your real tree or use as a present topper!

Kiahla earrings giveaway

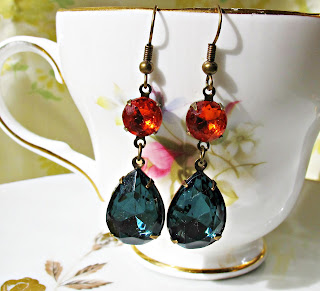
image glam it up kiahla earrings montana blue hyacinth orange

I know I didn't think I would have time to run another giveaway before Christmas, but since my Kiahla earrings giveaway (back in May) was so popular, I thought I would give away another pair of these pretties!  Just head over to my Facebook page, be a liker and share the giveaway post on your personal profile - it's that simple.  And it ends tonight so get in quick!   :)

Wednesday, 12 December 2012

My Creative Space

image felt food cookies jam iced frosting biscuit macarons teabags

After what seemed like a frantic week of sewing, I finally finished my order of felt food toy sets and have one very happy customer!  The small set I made consisted of biscuits (cookies), macarons and teabags, while the larger set had a range of the tea time treats we all know and love.
image felt play food desserts swiss rolls cucpakes macarons iced biscuits frosting jam cookies teabags
I also managed to find some time to sew up a few new buntings for Domum Vindemia before our family weekend away.  I am currently a little obsessed with adding cute trims to my doily buntings - what do you think?
image vintage doily buntings lime green sunshine yellow orange neon pom pom
Greta, Serenity and Arianna buntings

Monday, 10 December 2012

In The Press

image homespun magazine december 2012 issue 13 pride and prejudice jewellery jane austen
 
Several months ago I was approached by Homespun magazine asking if they could include a photo of one of my Pride and Prejudice pieces in their Jane Austen-themed "window shopping" guide for the December issue of the magazine.  As you can imagine, I didn't hesitate to say YES, and have been patiently waiting ever since for the release of this issue!
Well, D-day (as it were) has finally arrived, and I was thrilled to receive a complementary copy of the magazine in the mail and see that several of my pieces have been included (see #11, top right).  And having had a bit of a read through the magazine, I am impressed by the range of projects the magazine covers, especially the ADORABLE felt toadstool house.
Now the Homespun editors tell me that that at least 50% of readers indicated that they made purchases or enquiries about products featured in the Homespun window shopping guide each issue.  So tell me, is your Christmas or birthday shopping inspired by gift guides you see in your favourite magazines or blogs?

Wednesday, 5 December 2012

Christmas Creating Revisited

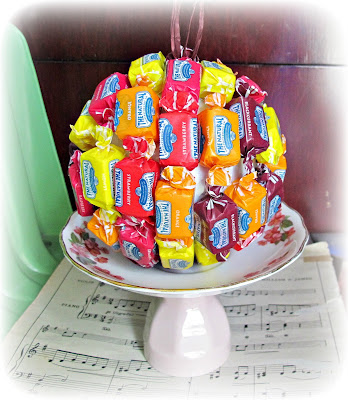
image christmas bauble ball edible lollies candy gift
 
I don't know about you, but I am still a little shell-shocked that it is December!  I have so much on at the moment, including lots of creating for a new stockist (details to come soon) as well as preparing end of year gifts for the monkeys' teachers and friends.  It can get pretty stressful coming up with new gift ideas, so I thought I would revisit a quick gift idea which I shared last year.  For those of you who don't remember it, I made several of these giant edible Christmas baubles as thank you gifts and to give to neighbours.  They are really very easy to put together, you only need to know how to use glue!  So head over to this post to find out how to make your own edible Christmas decorations.