Wednesday, 30 November 2011

Buttons, buttons, buttons

button bib necklace green verdant vintage two cheeky monkeys
The Verdant necklace

If you were to visit me right now you would find that there appear to be buttons almost everywhere in my living and dining rooms!  Why?  Because a fellow school/kindergarten mum saw the button bib necklace I made for myself (see here) and commissioned one for her "artiste" friend as a Christmas present.  I really enjoyed putting together a custom button bib necklace and ended up sorting all my buttons by colour and designing a few extra necklaces which I will list in my stores.  I don't think I'll be adding these necklaces as a regular item in my stores, they'll probably just be the occasional "special feature".  So what do you think?

button bib statement necklace mother of pearl white gold vintage acrylic
The Anne necklace

Friday, 25 November 2011

Feature Friday - Saponify


I know it's been a while since I've had a feature Friday post, so I am pleased to introduce Sarah of the wittily named Saponify.  Those who know me will know that I love body products, especially soaps, and Sarah has some amazing products in her store!!!

Tell us a bit about yourself.
Hi! My name is Sarah McManus, and I'm the owner, founder and maker at Saponify - luxury handmade. I moved to Sydney from New Zealand 6 years ago, and live in the sunny Inner West. I work from home, full time on my business.

Describe yourself in five words.
Creative, generous, loyal, playful, loving.
 
Rose, geranium, lavender and may chang soap

When and how did you first start crafting/creating?
I'd say my love of creating started when I was very young - watching both of my parents making amazing things seemingly constantly. Mum is a wonderful cook, and was always baking and making preserves when we were little, and Dad is very clever at building things from scratch. One of my earliest memories is 'helping' him build a jetty through the mangroves at the back of our house.
I started crafting in my early twenties, first knitting a scarf, and then progressing from there. Now I have a hand made business, so I guess you could say that things have come full circle. I still love to stitch, knit and create, but for now my focus is on Saponify, and I don't have a lot of spare time to make all the other bits and pieces that I'd like!

What do you create and what are your favourite materials with which to work?
I make beautiful, skin-loving Cold Process Soaps, Body Butters, Shea Butter Sugar Scrubs, Lip Balms and more!  One thing I couldn't live without is Fair Trade Organic Shea Butter. It is an excellent natural emollient (moisturiser), and is incredibly soothing to dry and chapped skin. I use it in generous amounts all of my soaps, and in almost every other product that I make.  I LOVE working with it!

Rosemary and mandarin hand and body butter

When and how did you start selling online?
I've been selling online for about 18 months now, through my website http://www.saponify.com.au/

Describe your store in 5 words.
Botanical, nourish, scent, colour, yum.
 
Who or what are the influences behind your creations?
I have a background in food, so that influences a lot of what I do, and how I come up with ideas for new products. Nature is also a big influence for me, the scent of flowers, the texture of ground nuts and seeds, the colours you can create by infusing herbs. I strive to create the most skin-loving products that I can, so everything in my range has been designed to make the most of what nature has on offer, and turn it into something that's effective, nourishing, and beautiful.

Spearmint and eucalyptus soap

Where can we find you online?
Facebook - https://www.facebook.com/pages/Saponify/135484216468031
Twitter - @Saponify
Store - saponify.com.au
Blog - blog.saponify.com.au
 
Special offer!!!
I'd love to offer your readers one free soap of their choosing with any purchase over $25.00 from now till 2 December 2011.
To claim your free soap, just write down which one it is that you'd like in the "Instructions to Merchant" screen of your website purchase, and I'll pop it in with your order. Yay!

Thursday, 24 November 2011

Teacher Appreciation Gifts

Yes, it's that time of year again when I start madly organising presents and Christmas cards for my girls' various teachers!  I am quite proud of how organised I have been this year as I have already gotten all presents and cards wrapped and ready to go, and it's only November.  Wonders never cease!


This cute little cupcake stand was made for cheeky monkey #1's Prep teacher, a woman who deserves a present just for spending the entire year trying to help my oldest monkey be less forgetful and more mindful of where she places her belongings!  And to make the gift even more special, I've topped the cupcake stand not with a cupcake, but with a pile of delicious, gourmet chocolates (which are, obviously, not pictured, LOL).


Due to my limited time this year, I haven't been able to make cupcake stands for all of the teachers.  However, I did manage to hunt down a stack of vintage sweet and condiment bowls which I filled with, yes, gourmet chocolates!  I am so very attracted to giving edible gifts which have a little something you can keep when all the yummies are gone.  The only problem with being so organised is that these pretty packages are sitting in my walk in wardrobe just tempting me to eat the chocolate!!!
What are you giving your children's teachers for their end of year appreciation gift?  Do you make something with your kids or do you madly hunt for something at your local shopping centre?  If you're still racking your brains trying to find something other than the usual box of chocolates or bath products that most teachers seem to receive, then hop on over to Domum Vindemia where you will find lots of pretty cupcake stands (as well as other goodies).  And if you need some gorgeous Christmas gift tags, then I got mine from the very talented Percival Road Designs and dkshopgirl!

Wednesday, 23 November 2011

My Creative Space

It's been a while since I've made anything new for my stores so I decided to kick back and relax by putting together some new creations for both Two Cheeky Monkeys and Domum Vindemia.  The first of my creations are these ring sets for little girls.  Cheeky monkey #2 was home with me so she helped me to put together the colour combinations in each set.  These sweet, little rings will fit your average 4-5 year old up to about an 8-9 year old child (and maybe older).


My next lot of creations have been sitting around for weeks waiting for me to put them together.  I have a lot of fun sourcing supplies for my vintage cupcake stands and this lot was no exception!  And, of course, it is all made sweeter when I find the perfect base for each beautiful plate or saucer.   :)


Friday, 18 November 2011

Pretty Things in My Letter Box

In the past few weeks I have been blessed to receive some beautiful goodies in the mail care of winning a few handmade giveaways.  The first is a cute brooch from the lovely Tess of Planet Treasures.  I "met" Tess via DUST on Etsy and have long admired her bright and funky jewellery creations and her beautiful sewn creations, especially the fabric brooches like the one she sent me!


My other gorgeous package came from sweet Daffy of the aptly named Sweet Heart Studio.  Daffy is another online friend whom I met through CAST on Etsy.  Like Tess, Daffy creates a range of beautiful items from inspiring glass tile magnets, to glass jewellery, to hair accessories and beaded jewellery.  Here is what she sent me:


Thank you to both of you wonderful ladies, it is a privilege for me to know you and count you among my online friends!

Wednesday, 16 November 2011

My Creative Space


If you're a regular reader of this blog you'll know how much I love making flowers and adding them to my various creations.  I have admired zipper flowers for a while now but haven't really had the time to experiment with making my own or hunt for a simple DIY tutorial.  So when I found this zipper flower tutorial the other week, I decided to get creating with a few old zips I found at my local op shop.


I really love the turquoise blue flower and have since attached it to a plain headband so that I can look glam (or attempt to) while keeping my hair out of my face.  The cheeky monkeys snapped up the pink flower to add to a headband which they are sharing with each other and I have been asked if I could please, please, please make another flower so that they can have two zipper flower headbands to mix and match!
I am quite addicted to making these funky zipper flowers, but I would suggest using a good quality fabric glue instead of the hot glue gun recommended in the tutorial (although I did get glue all over my fingers).  I'm thinking that I will turn some zipper flowers into ornaments for our Christmas tree and these flowers would probably make great brooches too.  So what's in your creative space this week?

Friday, 11 November 2011

Friday Finds - Dresses

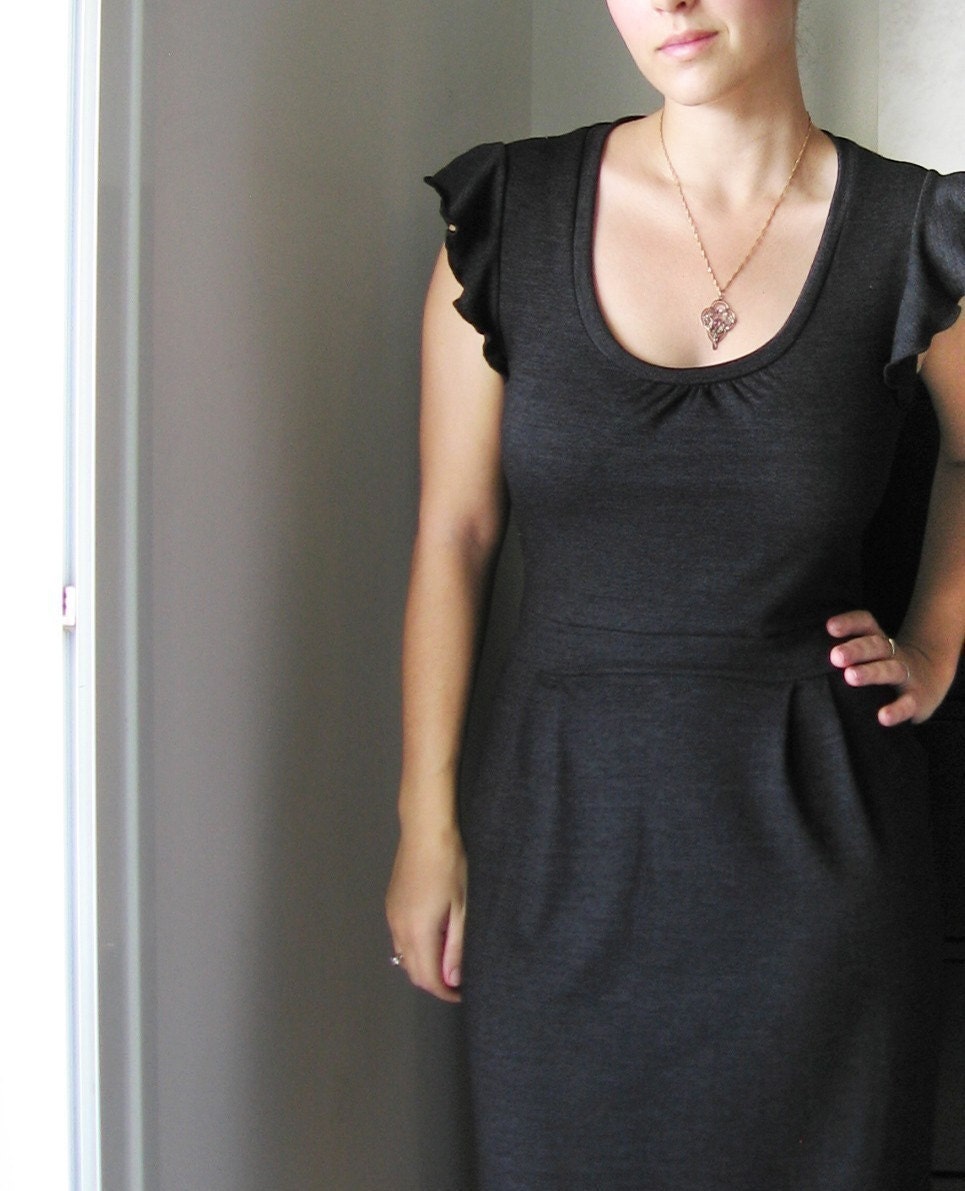
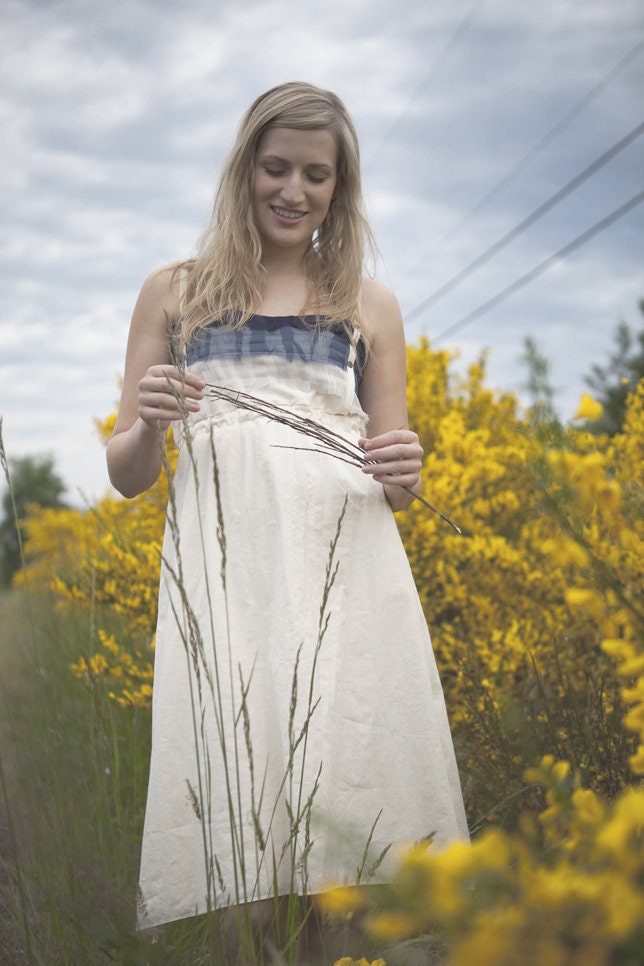
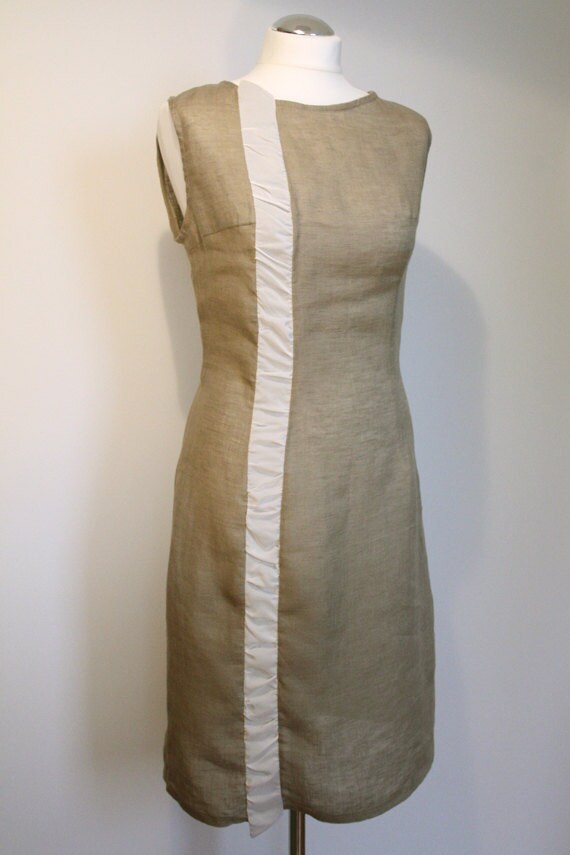
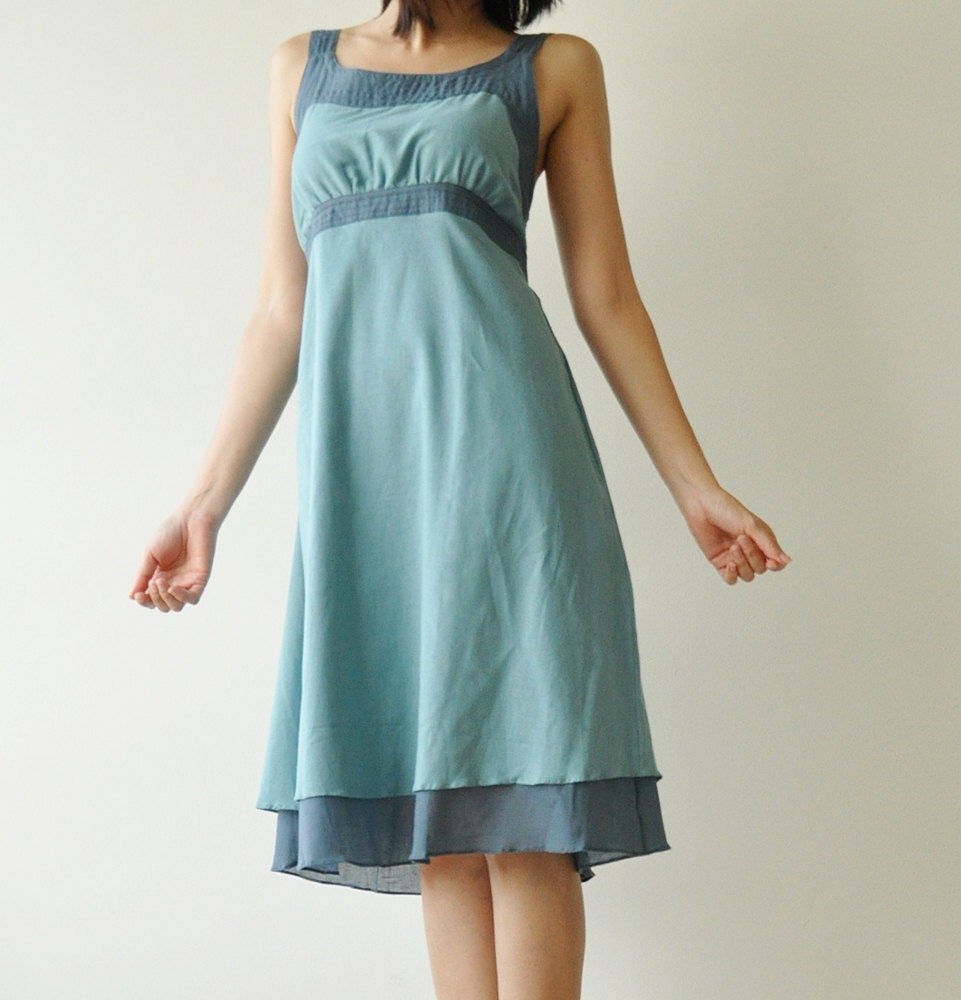
Since I started working again, I have been madly shopping for some work clothes.  Disappointingly, all I've managed to find so far is a bright turquoise cardi (which I loooove), but a search of Etsy has got me all excited that I may yet find the wardrobe additions that I'm looking for!


Wednesday, 9 November 2011

A "Pride and Prejudice" Custom Order

As you must most definitely know by now, I have a bit of a thing for making Pride and Prejudice-inspired jewellery and accessories for my Two Cheeky Monkeys stores.  Although it pains me to cut up books (I was raised with the "books are your friends" maxim), it does comfort me to know that the books I use for my creations were rescued from op shops and second hand bookstores where they had been sitting unloved and often in a rather battered condition.

image mr wickham ring pride and prejudice jane austen two cheeky monkeys jewellery jewelry bronze brass text page

In fact, once I get past the horror of cutting up a book (and a classic, no less!), I really quite enjoy putting together each P&P-themed piece.  So you can imagine my pleasure when I recently received an email from a customer saying that, while she liked the look of the Mr Wickham ring (see above), she wanted to order a similar ring bearing Mr Darcy's name to give to her friend (who is, as many seem to be, a Mr Darcy fan).  After several emails back and forth discussing the finer details of the order, I put together the ring shown below and now have a very pleased customer.  Hopefully the recipient of the Mr Darcy ring is just as pleased with my efforts!


And so you know, I am always thrilled to receive enquiries about custom orders, even with unique pieces like my P&P and Alice in Wonderland creations.  As you can see with this custom creation, I took the general design of a piece in-store and created something for my customer which is not currently available in my stores.  But I like the look of this ring so much that I think I'll be making a few more rings using the same design!

Monday, 7 November 2011

Adventures With Oilcloth

Yes, once again I have been a little slow on the craft uptake, but I have finally tried my hand at sewing with oilcloth.  I have wanted to make something with oilcloth for some time now but the impetus for my decision came when I was looking for suitable (and preferably eco-friendly) ways to transport my lunch to work and when I realised that Miss 6's old backpack was a bit small for carrying all her swimming gear to and from school swimming lessons.

oilcloth swimming tote pink strawberries mexican

The tote turned out to be a little bit on the BIG side, but Miss 6 won't let me alter it to a more suitable size.  That being said, such a large bag is probably a good thing since the kids store their school uniforms and shoes in the bag during their lesson and sopping wet swimsuits and heavy, wet towels after their lesson.  Miss 4 is now asking me for an identical swimming tote and I have told her I will make her one once I've had a bit of time for my sewing machine and me to recover from our struggles with the oilcloth, ha ha ha.

oilcloth lunch sandwich wrap blue hibiscus pattern

I am really pleased with how well my oilcloth lunch wraps turned out, although I did have some initial struggles with estimating the correct size for a wrap.  My main problem was that I didn't have a sandwich handy for measurements (and nobody was needing any food so I didn't want to go and make a sandwich that would then be wasted).  In the end, I used a stack of sandwich-sized serviettes as my measuring standard, LOL, and I think it worked out pretty well!  And, of course, these oilcloth lunch wraps were so easy to make that I'll be making a few for my girls to use at school and kindergarten too.
I have mostly enjoyed my sewing attempts with oilcloth, but I think it would all have been easier if I had bothered to buy a Teflon-coated sewing foot for my machine or at least bothered to cover my existing sewing foot in masking tape to prevent sticking.  I'm not sure what I'll make next with oilcloth (aside from another swimming tote and more sandwich wraps).  Have you tried sewing with oilcloth?  If so, what did you make?

Friday, 4 November 2011

Simple Button Headband Tutorial

novelty rainbow button headband

I have been meaning to blog about some cute and simple button headbands I made for the girls in September but I keep forgetting to do so!  This project is so simple that anyone who knows how to use a needle and thread could tackle it.  In fact, you could probably get away with just using your handy dandy hot glue gun for this project, but I am much better at using a needle and thread than a glue gun (LOL) and my kids are so destructive that I have to make things really sturdy!

novelty buttons shapes
Cute novelty buttons from Jambo Chameleon

I got the beautiful buttons for these headbands from my lovely online friend Sally, who runs the drool-worthy Jambo Chameleon.  Aren't they just so bright and cheery?  Sally kindly sent them to me as an extra prize from a giveaway she ran on her blog and my girls fell in love with them immediately.  They weren't sure what they wanted to do with the buttons until they started planning their outfits for cheeky monkey #1's rainbow-themed birthday party.  It suddenly became quite obvious to them that what they really needed were rainbow headbands!  So here is a quick little tutorial showing you how I made these headbands while in the midst of cooking and preparing for a birthday party.

Supplies
Buttons in your desired colours and shapes, preferably not shank buttons
Strong ribbon, such as grosgrain or thick satin/polyester
Sewing needle
Thread to match or complement buttons
5cm length of hat elastic

Method

blue buttons black ribbon

1. Measure your child's head (or your head!).  Cut a length of ribbon approximately 5cm/2 inches shorter than your required length.  Don't worry, you have the 5cm of hat elastic to add to the headband still!  Sort your buttons into your desired order and sew or glue them onto the ribbon.  The easiest way to ensure that you have sewn your buttons evenly along the length of your ribbon is to find the midpoint of your ribbon and sew the middle most button on at this point.  Or, if you have an even number of buttons like I did, sew the two middle buttons on at either side of your mid point.    :)

elastic sewn onto ribbon ends

2. Fold over the ends of your ribbon to neaten the edges and prevent the ribbon from fraying.  You can glue or sew the fold into place if you want.  If you are doing this in a rush, like I was, you can kill two birds with one stone by simply sewing the ends of the elastic over the folded ribbon, thereby securing your elastic and the folded edge at the same time!  (The photo shows a neat and messy version and I am a little embarrassed at how awful the messy version looks, LOL).

novelty button rainbow headband

3. And there you have it, one very simple, yet pretty and stylish, button headband to adorn your little one's head.  Use some elegant vintage buttons and you could have a funky headband for yourself too!

Wednesday, 2 November 2011

My Creative Space


Well, I've been back at work as a research scientist for a week and a half now so I am definitely not finding as much time to work on my  handmade creations as I used to!  But sitting on my craft desk this week (and tempting me to get back into my creating) are a stack of pretty saucers waiting to be turned into cupcake stands and some spools of thread ready to match the beautiful, vintage bias tape I will be adding to doily buntings for Domum Vindemia.  What's in your creative space this week?